Wednesday, 20 March 2024

Building an SMART CLASS ROOM APP in 5 Minutes using ChatGPT

 Create Mobile App

Step 1:

Get the code from https://chat.openai.com/ Login using your google A/C.

Give prompts : 

P1: I want to create Reservation of a Smart class room app. Please generate the mobile responsive code for HTML, CSS and JavaScript. Add gradient background color

You will get 3 code snippets index.html, style.css, script.js.

Copy only the styles.css code, paste to new directory say "ALLOTSCR" in the name styles.css and save.

body {
    margin: 0;
    padding: 0;
    font-family: Arial, sans-serif;
    background: linear-gradient(to bottom, #4facfe, #00f2fe);
  }
 
  .container {
    max-width: 600px;
    margin: 50px auto;
    padding: 20px;
    background-color: rgba(255, 255, 255, 0.8);
    border-radius: 10px;
  }
 
  h1 {
    text-align: center;
    color: #333;
  }
 
  .form {
    margin-top: 20px;
  }
 
  label, input, select, button {
    display: block;
    margin-bottom: 10px;
  }
 
  input, select, button {
    width: 100%;
    padding: 10px;
    border: 1px solid #ccc;
    border-radius: 5px;
  }
 
  button {
    background-color: #4caf50;
    color: white;
    cursor: pointer;
  }
 
  button:hover {
    background-color: #45a049;
  }
 
  p#message {
    margin-top: 10px;
    text-align: center;
  }
 

P2: Please add code for view the reserved dates and restrict reservation if it is already reserved.

You will get modified code for html and js files. Again you type the below as prompt in chatGPT.

P3: Add functionalities in the above mobile app. To display reserved date and time slot, to restrict reserve if already time slot and date is reserved

You will get again html and Js modified files. Now you copy the index.html and script.js in seperate files in the above directory as index.html and script.js

index.html

<!DOCTYPE html>
<html lang="en">
<head>
  <meta charset="UTF-8">
  <meta name="viewport" content="width=device-width, initial-scale=1.0">
  <title>Smart Classroom Reservation</title>
  <link rel="stylesheet" href="styles.css">
</head>
<body>
  <div class="container">
    <h1>Smart Classroom Reservation</h1>
    <div class="form">
      <label for="date">Select Date:</label>
      <input type="date" id="date" name="date">
      <label for="time">Select Time Slot:</label>
      <select id="time" name="time">
        <option value="morning">Morning</option>
        <option value="afternoon">Afternoon</option>
        <option value="evening">Evening</option>
      </select>
      <button onclick="checkReservation()">Check Reservation</button>
      <p id="reservation-status"></p>
      <button onclick="reserveClassroom()">Reserve</button>
      <p id="message"></p>
    </div>
    <div class="reserved-dates">
      <h2>Reserved Dates and Time Slots:</h2>
      <ul id="reserved-list">
        <!-- Reserved dates and time slots will be dynamically added here -->
      </ul>
    </div>
  </div>
  <script src="script.js"></script>
</body>
</html>

script.js

var reservations = [];

function checkReservation() {
  var date = document.getElementById("date").value;
  var time = document.getElementById("time").value;
  var reservationStatus = document.getElementById("reservation-status");

  // Check if the selected date and time slot are already reserved
  if (reservations.find(r => r.date === date && r.time === time)) {
    reservationStatus.innerText = "This time slot is already reserved.";
  } else {
    reservationStatus.innerText = "This time slot is available for reservation.";
  }
}

function reserveClassroom() {
  var date = document.getElementById("date").value;
  var time = document.getElementById("time").value;
  var message = document.getElementById("message");

  // Check if date and time are selected
  if (date && time) {
    // Check if the selected date and time slot are already reserved
    if (reservations.find(r => r.date === date && r.time === time)) {
      message.innerText = "This date and time slot are already reserved.";
    } else {
      reservations.push({ date: date, time: time });
      message.innerText = "Classroom reserved for " + date + " " + time + ".";
      updateReservedSlots();
    }
  } else {
    message.innerText = "Please select both date and time.";
  }
}

function updateReservedSlots() {
  var reservedList = document.getElementById("reserved-list");
  reservedList.innerHTML = "";
  reservations.forEach(function(reservation) {
    var listItem = document.createElement("li");
    listItem.innerText = "Date: " + reservation.date + ", Time: " + reservation.time;
    reservedList.appendChild(listItem);
  });
}

Save all theree files. Compress these 3 files to to a zip file.

Step2:

go to https://wl.tools/tiiny_host.

Login thru your google a/c

Upload/Drag and dropy your zip file. It will give online URL. Copy the https://orange-marylynne-81.tiiny.site/  (in my case)


Step 3: Convert to play store app 

Go to https://www.webintoapp.com/.

Go to app maker tab. Give URL as your copied URL (as above),  mobile for Simulator and Press Make APP.

It will do some process and give URL. Copy that  URL for this App, If you paste into browser you  may get similar screen as shown below:


In dashboard, click Maker Tab. It will give screen like this.
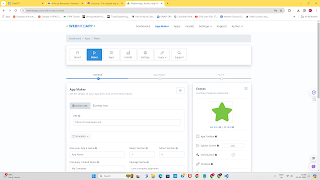
One it is done, you will get Mobile APP like this 


Wow You have done it in Just 5 Minutes.!!!! 
You can download zip file and store it in your PC. You can extract. You can see apk file. which can be used in installing in Android phones.
Have fun by modifying the above code!!!
YTC referred : https://www.youtube.com/watch?v=EsRyyJmO-u8
Web sites refrred:
https://chat.openai.com/
https://codepen.io/
https://wl.tools/tiiny_host
https://www.webintoapp.com/app-maker 😂😂😂😂😂🎈yaxh180223$@gmail.com

Tuesday, 19 March 2024

Building a Chatbot Using the Google PaLM API and FrontEnd with Flask

Pathway Language Model (PaLM)

It is a powerful  LLM for Generative AI by Google.

Let us use this to make ChatBot.

Step 1:

Go to https://makersuite.google.com/app/apikey

Login using your Google A/C 

Get palm_api_key and store in safe place

Create a New directory "PALMCHAT"in your Hard Drive.

Below PALMCHAT create another sub directory "template"

Step 2: [Backend- Server]

Now in Visual Studio Code, Open Folder PALMCHAT

Create the file .env and put the following contents

OPENAI_API_KEY = "palm_api_key"

Create another file server.py andd add the following code:

from flask import Flask, render_template, request
import google.generativeai as palm
import os
from dotenv import load_dotenv
load_dotenv()
palm_api_key = os.environ["OPENAI_API_KEY"]

palm.configure(api_key="AIzaSyBNI2rLwpVKs3mI4fG5dZ5OVzIga0-iPy8")

app = Flask(__name__)

@app.route("/")
def home():
    return render_template("index.html")

@app.route("/chatbot", methods=["POST"])
def chatbot():
    user_input = request.form["message"]
   
    models = [m for m in palm.list_models() if 'generateText' in m.supported_generation_methods]
    model = models[0].name
   
    prompt =f"User: { user_input} \n AUCSE PaLM Bot:"

    response = palm.generate_text(
        model = model,
        prompt = prompt,
        stop_sequences=None,
        temperature=0,
        max_output_tokens=100
    )

    bot_response = response.result

    chat_history = []
    chat_history.append(f"Use: {user_input} \n AUCSE Palm BOT {bot_response}")

    return render_template(
        "chatbot.html",
        user_input=user_input,
        bot_response=bot_response,
        chat_history=chat_history
    )
if __name__ == "__main__":
    app.run(debug=True)


 In terminal 

pip install flask
pip install dotenv
pip install google.generativeai

Step 3: [Front End- index, chatbot.htmls files ]

Under the subdirectory create files index.html with the following contents

<html lang="en">
<head>
    <meta charset="UTF-8">
    <meta name="viewport" content="width=device-width, initial-scale=1.0">
    <title>AUCSE PaLM Bot</title>
</head>
<body>
    <h1>AUCSE PaLM BOT</h1>
    <p>AUCSE PaLM Bot: Welcome to our AUCSE ! </p>
    <form method="post" action="{{url_for('chatbot')}}" class="chat-input">
        <input type="text" id="message" name="message" placeholder="type your msg...">
        <button type="submit">Send</button>    
    </form>
</body>
</html>

create anotherfile chatbot.html with the following code (same as above with little modification with adding after <h1> tag <p>{{bot_response}}<p>
<html lang="en">
<head>
    <meta charset="UTF-8">
    <meta name="viewport" content="width=device-width, initial-scale=1.0">
    <title>AUCSE Chat Bot</title>
</head>
<body>
    <h1>AUCSE PaLM BOT</h1>
    <p>{{bot_response}}</p>
     <form method="post" action="{{url_for('chatbot')}}" class="chat-input">
        <input type="text" id="message" name="message" placeholder="type your msg...">
        <button type="submit">Send</button>
    </form>
</body>
</html>

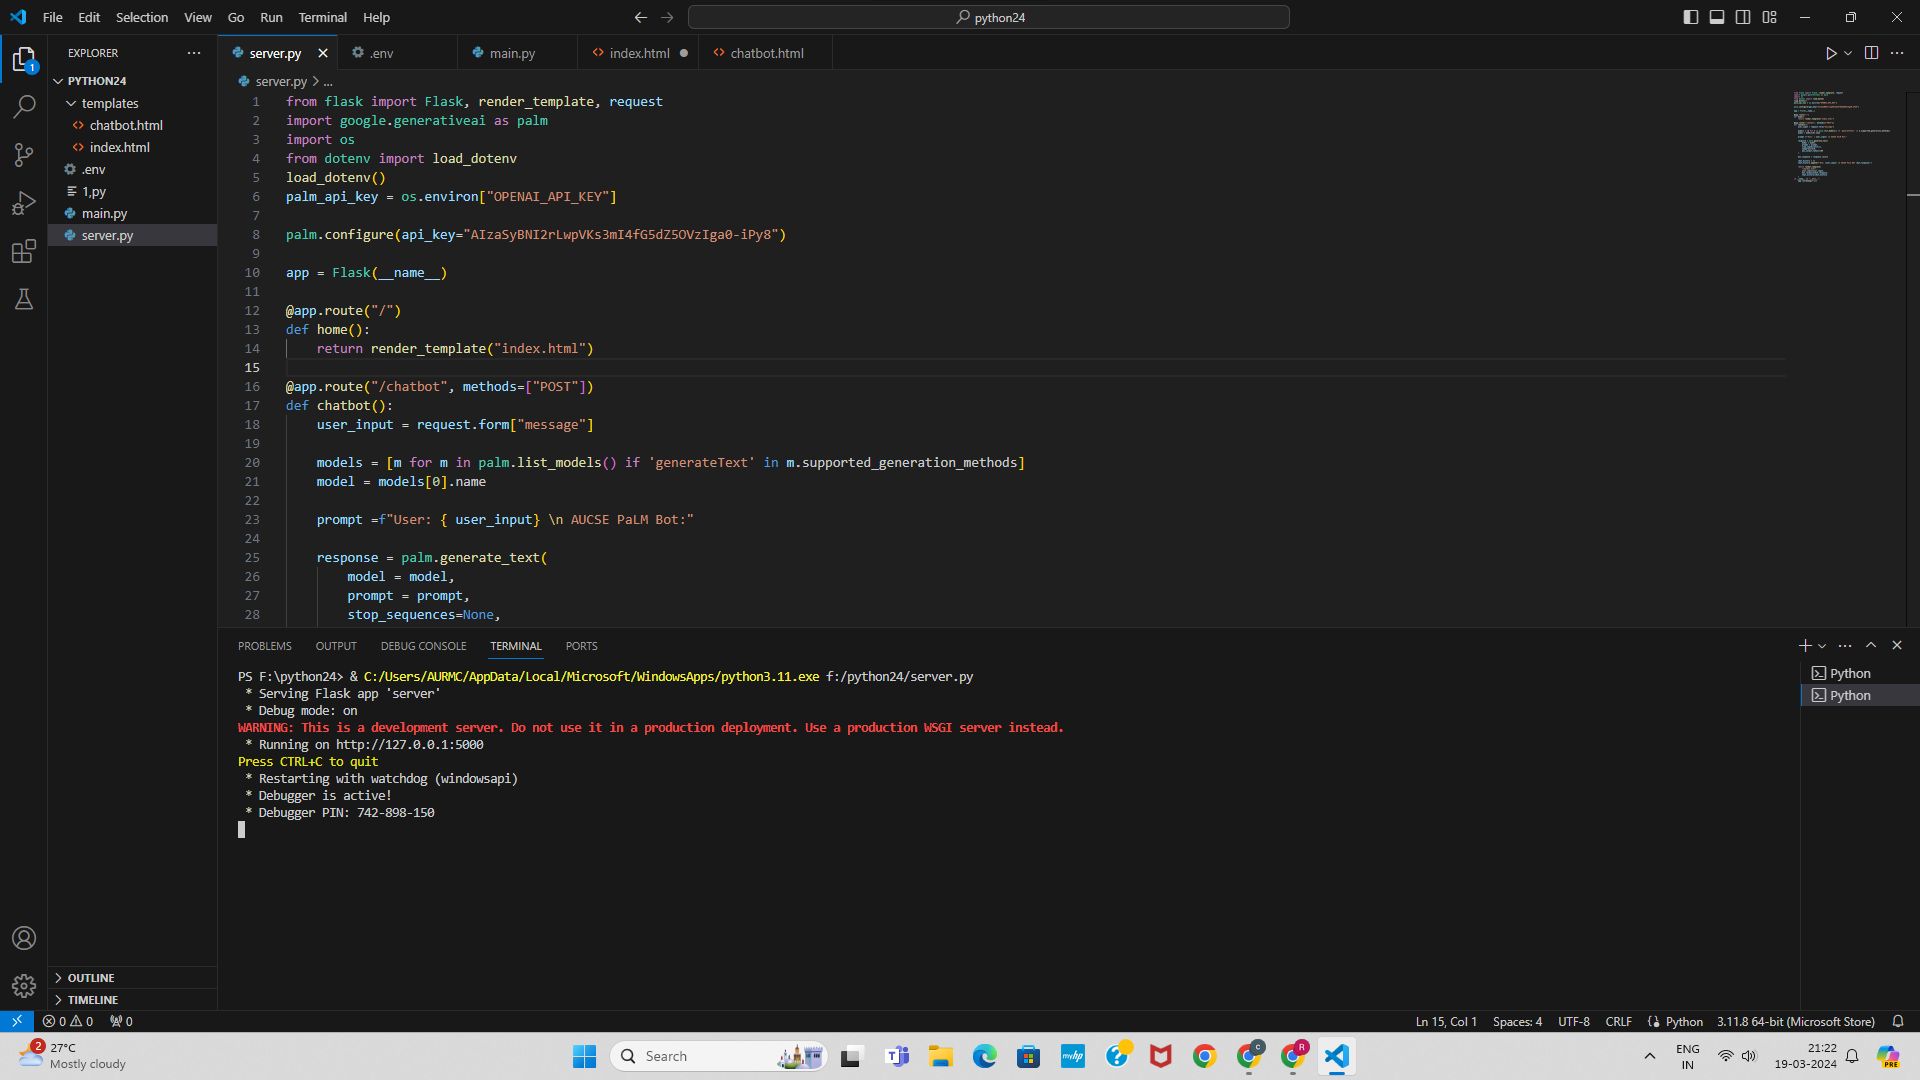
Now run server.py by clicking the top right button play(run) . You will get screen similar according to your environment

If you click the above image, you will see the contents clearly. You can see the server running,
with line Running on http://127.0.0.1:5000. If you move your mouse, place on that, and CTRL + CLICK, you will get browser window similar as shown below:
If you enter question 
What is AWS?
You will get screen as shown below:

Wow ! It is so Simple to generate a basic PalM based Chat bot with google Generative Ai and Flask in Python. 

You can modify model, parameters like temperature, max_number_tokens, etc., as per your will and requirements. You can add features.
You can beautify with css in html files for stunning look and feel. Deep dive in to PaLM!! Have greate Fun and Enjoy! Sky is even no Limit?!


Sunday, 17 March 2024

Bot to read our local PDF and answer using Openai, Embeddings, Langchain & Streamlit

Chat with PDF  | Chatbot Bio-query use case

In visual code Studio, creat directory usecase3 and creat a file search.py

pip install chatpdf

load and split pdf

Create a file names search.py

#load and split pdf

from langchain.document_loaders import PyPDFLoader
loader = PyPDFLoader("test.pdf")
pages_content = loader.load_and_split()
print(len(pages_content), pages_content)


You will get dictionary output with filename, meta data, page no etc.

Now type as below and Run

#load pdf and split

from langchain.document_loaders import PyPDFLoader
loader = PyPDFLoader("test.pdf")
pages_content = loader.load_and_split()
#print(len(pages_content), pages_content)

# #refer openai api embeddings

from langchain.embeddings.openai import OpenAIEmbeddings
from langchain_openai import OpenAIEmbeddings
from langchain.vectorstores import FAISS


embeddings = OpenAIEmbeddings()
db = FAISS.from_documents(pages_content, embeddings)

db.save_local("faiss_index")  # to save local copy

nwdb = FAISS.load_local("faiss_index", embeddings,
                        allow_dangerous_deserialization=True)

query = "are there any educational qualification"
docs  =  nwdb.similarity_search(query) # to create similarity index
# print(docs)

from langchain.chains import RetrievalQA
from langchain.chat_models import ChatOpenAI
llm = ChatOpenAI()  # creat chatbot

qa_chain = RetrievalQA.from_chain_type(llm, retriever=nwdb.as_retriever())
res =qa_chain({"query" : "are there any educational qualification"})
print(res)

Save and Run as streamlit run app.py  to get streamlit.app tab in the browser 

Pl. double click the image to see clearly. 

Now type in the text window Educational qualification in bullet points  
and then press play button. You may get the screen as shown below:


Wow ! we have done a chatbot answering questions from my test.pdf

This is the simplest way with openai, embeddings, langchain and streamlit we could develope our custom made chatbot. This is the beginning. You can change code in app.py by refereinng streamlit documentation  to change your frontent and enjoy!!!😊😊😊😊😊😊😊😊
Please use your PDF and change queries as per your PDF.🎈

index.html

Mobile Tea/Coffee POS Chai POS Mobile Tea/Coffee & Snacks Billing ...