Monday, 8 April 2024

ANOVA - Primer

Analysis of  Variance 


What is ANOVA

Analysis of Variance

Statistical test for detecting differences in the group means when there is one one parametric dependent variable and one or more independent variable.

We are intrested in determining whther differences exist between the population means.


Types of ANOVA

1 - way and 2-way
1-way:
 - 1 dependent and 1 independent variable
2-way :
 - 2 dependent and 2 or more independent variables


Key terms

Null Hypothesis H0
 - General statement that states that no relationship between 2 measured phonomena or no association amoong groups
Alternative Hypothesis HA
 - Contrary to Null hypothesis, it states that whenever something is happening, a new theory is preferred instead of old
P Value
  - The probability of finding the observed, or more extreme, results when null hypothesis of a study question is True. 
Alpha Value 
  - Creterion for determining whther a test statistic is technically significant.
F - statistics
  - Extent of difference between the means of different trials
Sum of Squares
  - Variation from the mean of different medical trials
Mean
  - Average of all the results from evidences like medical trials.


How we can use ANOVA

Anova determines whther the groups created by the levels of independent  variable are statistically different by  calculatin the whether the means of the different samples are different from the overall mean of the dependent variable

If any of  group means is significantly different from the overall mean, then the null hypothesis is rejected.

F - Statistics

Value you get when you run the ANOVA test to find out if the means bewteen two populations are significantly different.

Between-group variance is large relative to the value within group variance, so F statistic will be larger & > the critical value, therefore significantly different.

ANOVA formula

is made up of numerous parts. The best way to tackle an ANOVA test problem is to organize the formulae inside an ANOVA table. Below are the ANOVA formulae.

Source of Variation

Sum of Squares

Degree of Freedom

Mean Squares

F Value

Between GroupsSSB = Σnj(X̄j– X̄)2df1 = k – 1MSB = SSB / (k – 1)

f = MSB / MSE

or, F = MST/MSE

ErrorSSE = Σnj(X̄- X̄j)2df2 = N – kMSE = SSE / (N – k) 
TotalSST = SSB + SSEdf3 = N – 1  

where,

  • F = ANOVA Coefficient
  • MSB = Mean of the total of squares between groupings
  • MSW = Mean total of squares within groupings
  • MSE = Mean sum of squares due to error
  • SST = total Sum of squares
  • p = Total number of populations
  • n = The total number of samples in a population
  • SSW = Sum of squares within the groups
  • SSB = Sum of squares between the groups
  • SSE = Sum of squares due to error
  • s = Standard deviation of the samples
  • N = Total number of observations


Worked Examples


Example 1: Three different kinds of food are tested on three groups of rats for 5 weeks. The objective is to check the difference in mean weight(in grams) of the rats per week. Apply one-way ANOVA using a 0.05 significance level to the following data:
Food IFood IIFood III
8411
1258
1947
8613
697
1179

Solution:

H0: μ1= μ23

H1: The means are not equal

Since, X̄1 = 5, X̄2 = 9, X̄3 = 10

Total mean = X̄ = 8

SSB = 6(5 – 8)2 + 6(9 – 8)2 + 6(10 – 8)2 = 84

SSE = 68

MSB = SSB/df= 42

MSE = SSE/df2 = 4.53

f = MSB/MSE = 42/4.53 = 9.33

Since f > F, the null hypothesis stands rejected.

Example 2: Calculate the ANOVA coefficient for the following data:

PlantNumberAverage spans
Hibiscus5122
Marigold5161
Rose5204

Solution:

Plantnxss2
Hibiscus51224
Marigold51611
Rose520416

p = 3
n = 5
N = 15
x̄ = 16
SST = Σn(x−x̄)2

SST= 5(12 − 16)+ 5(16 − 16)2 + 11(20 − 16)2 = 160

MST = SST/p-1 = 160/3-1 = 80

SSE = ∑ (n−1) = 4 (4 + 1) + 4(16) = 84

MSE = 7

F = MST/MSE = 80/7
 
F = 11.429


Example 3: The following data show the number of worms quarantined from the GI areas of four groups of muskrats in a carbon tetrachloride anthelmintic study. Conduct a two-way ANOVA test.

IIIIIIIV
338412124389
324387353432
268400469255
147233222133
309212111265

Solution:

Source of VariationSum of SquaresDegrees of FreedomMean Square
Between the groups62111.689078.067
Within the groups98787.8164567.89
Total167771.424 

Since F = MST / MSE

           = 9.4062 / 3.66 = 2.57 

  1. Example 4: Three types of fertilizers are used on three groups of plants for 5 weeks. We want to check if there is a difference in the mean growth of each group. Using the data given below apply a one way ANOVA test at 0.05 significant level.

    Fertilizer 1Fertilizer 2Fertilizer 3
    6813
    8129
    4911
    5118
    367
    4812

    Solution:

    01 = 2 = 3

    1: The means are not equal

    Fertilizer 1Fertilizer 2Fertilizer 3
    6813
    8129
    4911
    5118
    367
    4812
    ¯1 = 5¯1 = 9¯1 = 10

    Total mean, ¯ = 8

    1 = 2 = 3 = 6, k = 3

    SSB = 6(5 - 8)2 + 6(9 - 8)2 + 6(10 - 8)2

    = 84

    df1 = k - 1 = 2

    Fertilizer 1(X - 5)2Fertilizer 2(X - 9)2Fertilizer 3(X - 10)2
    6181139
    8912991
    4190111
    5011484
    346979
    4181124
    ¯1 = 5Total = 16¯1 = 9Total = 24¯1 = 10Total = 28

    SSE = 16 + 24 + 28 = 68

    N = 18

    df2 = N - k = 18 - 3 = 15

    MSB = SSB / df1 = 84 / 2 = 42

    MSE = SSE / df2 = 68 / 15 = 4.53

    ANOVA test statistic, f = MSB / MSE = 42 / 4.53 = 9.33

    Using the f table at  = 0.05 the critical value is given as F(0.05, 2, 15) = 3.68

    As f > F, thus, the null hypothesis is rejected and it can be concluded that there is a difference in the mean growth of the plants.

    Answer: Reject the null hypothesis


Sunday, 7 April 2024

Vector Data Base - Primer using Chroma DB

What is Vector database

A vector database is a kind of database that is designed to store, index and retrieve data points with multiple dimensions, which are commonly referred to as vectors.

Each deimension capture particular feature. Key concepts are Vectors and Similarity Search. Vectors are numerical array. Similarity search uses indexing and searching algorithms, most relevant to the query.

Vector database stores in embeddings, nothing but numerical codes which encapsulate the key charecteristics of obejct of interest.

Difference between tradiotional and Vector database

Tradional based on the scalar datatypes, 2 dimensional - rows and column- table like structure, optimized for transactional data and exact match by methods like search queries.

Vector based on vector data types, multi dimensional space structure. optimized for AI and ML applications and seacrh methods involving  semantic seacrh (cosine Similarity) and similarity search.  

Benefits:

Fast and Accurate Seach
Mostle correct Response
Semantic Understanding

Handson

Enter to colab using your goocle account

create a new note with name demo_chromadb

Click +Code cell

add this code to install chromadb abd senetence-transformer

!pip install chromadb -q
!pip install sentence-transformers -q

Click +Code, add this code to create a client

import chromadb

client = chromadb.Client()
collection = client.create_collection("aucse_demo")

Click +Code, add this code to add documents


collection.add(
    documents=["This is a document about cat", "This is a document about car"],
    metadatas=[{"category": "animal"}, {"category": "vehicle"}],
    ids=["id1", "id2"]
)

Click +Code, add this code to make a semantic query

results = collection.query(
    query_texts=["vehicle"],
    n_results=1
)
print(results)


You will get ouput like

{'ids': [['id2']], 'distances': [[0.8069301843643188]],
'metadatas': [[{'category': 'vehicle'}]],
'embeddings': None,
'documents': [['This is a document about car']],
'uris': None, 'data': None
}

The above DB is in Memory. So it is very easy and simple.
If you want to create a persistent vbdir, add five files of .txt.


Crete a folder in your notebook called 'vbdb' add some files

Click +Code, add this code to  Reading a file from folder

import os

def read_files_from_folder(folder_path):
    file_data = []

    for file_name in os.listdir(folder_path):
        if file_name.endswith(".txt"):
            with open(os.path.join(folder_path, file_name), 'r') as file:
                content = file.read()
                file_data.append({"file_name": file_name, "content": content})

    return file_data

folder_path = "/content/vbdir"  # your folder path
file_data = read_files_from_folder(folder_path)

for data in file_data:
    print(f"File Name: {data['file_name']}")
    print(f"Content: {data['content']}\n")

Click +Code, add this code to  make collections

documents = []
metadatas = []
ids = []

for index, data in enumerate(file_data):
    documents.append(data['content'])
    metadatas.append({'source': data['file_name']})
    ids.append(str(index + 1))

pet_collection = client.create_collection("pet_collection")

pet_collection.add(
    documents=documents,
    metadatas=metadatas,
    ids=ids
)

Click +Code, add this code to  get results

results = pet_collection.query(
    query_texts=["What are the different kinds of pets people commonly own?"],
    n_results=1
)
print(results)

Click +Code, add this code to  get metadata

metadatas

Click +Code, add this code to  get results for a new query

results = pet_collection.query(
    query_texts=["What are the different kinds of pets people commonly own?"],
    n_results=1
)
print(results)

Click +Code, add this code to  get results for a new query

pet_collection.query(
    query_texts=["What are the emotional benefits of owning a pet?"],
    n_results=1,
    where_document={"$contains":"reptiles"}
)
print(results)


results = pet_collection.query(
    query_texts=["What are the emotional benefits of owning a pet?"],
    n_results=1,
    where={"source": "Training and Behaviour of Pets.txt"}
)
print(results)


Click +CODE to use different model

from sentence_transformers import SentenceTransformer

model = SentenceTransformer('paraphrase-MiniLM-L3-v2')

documents = []
embeddings = []
metadatas = []
ids = []

for index, data in enumerate(file_data):
    documents.append(data['content'])
    embedding = model.encode(data['content']).tolist()
    embeddings.append(embedding)
    metadatas.append({'source': data['file_name']})
    ids.append(str(index + 1))

click +code to add for Creating a new collection

pet_collection_emb = client.create_collection("pet_collection_emb") pet_collection_emb.add( documents=documents, embeddings=embeddings, metadatas=metadatas, ids=ids )

Code to search again

query = "What are the different kinds of pets people commonly own?" input_em = model.encode(query).tolist() results = pet_collection_emb.query( query_embeddings=[input_em], n_results=1 ) print(results)

Code to make a query about what foods are recommended for dogs

query = "foods that are recommended for dogs?"
input_em = model.encode(query).tolist()

results = pet_collection_emb.query(
    query_embeddings=[input_em],
    n_results=1
)
print(results)


Wednesday, 20 March 2024

Building an SMART CLASS ROOM APP in 5 Minutes using ChatGPT

 Create Mobile App

Step 1:

Get the code from https://chat.openai.com/ Login using your google A/C.

Give prompts : 

P1: I want to create Reservation of a Smart class room app. Please generate the mobile responsive code for HTML, CSS and JavaScript. Add gradient background color

You will get 3 code snippets index.html, style.css, script.js.

Copy only the styles.css code, paste to new directory say "ALLOTSCR" in the name styles.css and save.

body {
    margin: 0;
    padding: 0;
    font-family: Arial, sans-serif;
    background: linear-gradient(to bottom, #4facfe, #00f2fe);
  }
 
  .container {
    max-width: 600px;
    margin: 50px auto;
    padding: 20px;
    background-color: rgba(255, 255, 255, 0.8);
    border-radius: 10px;
  }
 
  h1 {
    text-align: center;
    color: #333;
  }
 
  .form {
    margin-top: 20px;
  }
 
  label, input, select, button {
    display: block;
    margin-bottom: 10px;
  }
 
  input, select, button {
    width: 100%;
    padding: 10px;
    border: 1px solid #ccc;
    border-radius: 5px;
  }
 
  button {
    background-color: #4caf50;
    color: white;
    cursor: pointer;
  }
 
  button:hover {
    background-color: #45a049;
  }
 
  p#message {
    margin-top: 10px;
    text-align: center;
  }
 

P2: Please add code for view the reserved dates and restrict reservation if it is already reserved.

You will get modified code for html and js files. Again you type the below as prompt in chatGPT.

P3: Add functionalities in the above mobile app. To display reserved date and time slot, to restrict reserve if already time slot and date is reserved

You will get again html and Js modified files. Now you copy the index.html and script.js in seperate files in the above directory as index.html and script.js

index.html

<!DOCTYPE html>
<html lang="en">
<head>
  <meta charset="UTF-8">
  <meta name="viewport" content="width=device-width, initial-scale=1.0">
  <title>Smart Classroom Reservation</title>
  <link rel="stylesheet" href="styles.css">
</head>
<body>
  <div class="container">
    <h1>Smart Classroom Reservation</h1>
    <div class="form">
      <label for="date">Select Date:</label>
      <input type="date" id="date" name="date">
      <label for="time">Select Time Slot:</label>
      <select id="time" name="time">
        <option value="morning">Morning</option>
        <option value="afternoon">Afternoon</option>
        <option value="evening">Evening</option>
      </select>
      <button onclick="checkReservation()">Check Reservation</button>
      <p id="reservation-status"></p>
      <button onclick="reserveClassroom()">Reserve</button>
      <p id="message"></p>
    </div>
    <div class="reserved-dates">
      <h2>Reserved Dates and Time Slots:</h2>
      <ul id="reserved-list">
        <!-- Reserved dates and time slots will be dynamically added here -->
      </ul>
    </div>
  </div>
  <script src="script.js"></script>
</body>
</html>

script.js

var reservations = [];

function checkReservation() {
  var date = document.getElementById("date").value;
  var time = document.getElementById("time").value;
  var reservationStatus = document.getElementById("reservation-status");

  // Check if the selected date and time slot are already reserved
  if (reservations.find(r => r.date === date && r.time === time)) {
    reservationStatus.innerText = "This time slot is already reserved.";
  } else {
    reservationStatus.innerText = "This time slot is available for reservation.";
  }
}

function reserveClassroom() {
  var date = document.getElementById("date").value;
  var time = document.getElementById("time").value;
  var message = document.getElementById("message");

  // Check if date and time are selected
  if (date && time) {
    // Check if the selected date and time slot are already reserved
    if (reservations.find(r => r.date === date && r.time === time)) {
      message.innerText = "This date and time slot are already reserved.";
    } else {
      reservations.push({ date: date, time: time });
      message.innerText = "Classroom reserved for " + date + " " + time + ".";
      updateReservedSlots();
    }
  } else {
    message.innerText = "Please select both date and time.";
  }
}

function updateReservedSlots() {
  var reservedList = document.getElementById("reserved-list");
  reservedList.innerHTML = "";
  reservations.forEach(function(reservation) {
    var listItem = document.createElement("li");
    listItem.innerText = "Date: " + reservation.date + ", Time: " + reservation.time;
    reservedList.appendChild(listItem);
  });
}

Save all theree files. Compress these 3 files to to a zip file.

Step2:

go to https://wl.tools/tiiny_host.

Login thru your google a/c

Upload/Drag and dropy your zip file. It will give online URL. Copy the https://orange-marylynne-81.tiiny.site/  (in my case)


Step 3: Convert to play store app 

Go to https://www.webintoapp.com/.

Go to app maker tab. Give URL as your copied URL (as above),  mobile for Simulator and Press Make APP.

It will do some process and give URL. Copy that  URL for this App, If you paste into browser you  may get similar screen as shown below:


In dashboard, click Maker Tab. It will give screen like this.
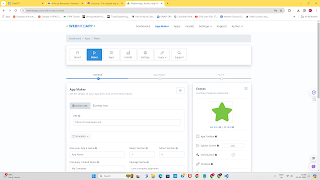
One it is done, you will get Mobile APP like this 


Wow You have done it in Just 5 Minutes.!!!! 
You can download zip file and store it in your PC. You can extract. You can see apk file. which can be used in installing in Android phones.
Have fun by modifying the above code!!!
YTC referred : https://www.youtube.com/watch?v=EsRyyJmO-u8
Web sites refrred:
https://chat.openai.com/
https://codepen.io/
https://wl.tools/tiiny_host
https://www.webintoapp.com/app-maker 😂😂😂😂😂🎈yaxh180223$@gmail.com

Tuesday, 19 March 2024

Building a Chatbot Using the Google PaLM API and FrontEnd with Flask

Pathway Language Model (PaLM)

It is a powerful  LLM for Generative AI by Google.

Let us use this to make ChatBot.

Step 1:

Go to https://makersuite.google.com/app/apikey

Login using your Google A/C 

Get palm_api_key and store in safe place

Create a New directory "PALMCHAT"in your Hard Drive.

Below PALMCHAT create another sub directory "template"

Step 2: [Backend- Server]

Now in Visual Studio Code, Open Folder PALMCHAT

Create the file .env and put the following contents

OPENAI_API_KEY = "palm_api_key"

Create another file server.py andd add the following code:

from flask import Flask, render_template, request
import google.generativeai as palm
import os
from dotenv import load_dotenv
load_dotenv()
palm_api_key = os.environ["OPENAI_API_KEY"]

palm.configure(api_key="AIzaSyBNI2rLwpVKs3mI4fG5dZ5OVzIga0-iPy8")

app = Flask(__name__)

@app.route("/")
def home():
    return render_template("index.html")

@app.route("/chatbot", methods=["POST"])
def chatbot():
    user_input = request.form["message"]
   
    models = [m for m in palm.list_models() if 'generateText' in m.supported_generation_methods]
    model = models[0].name
   
    prompt =f"User: { user_input} \n AUCSE PaLM Bot:"

    response = palm.generate_text(
        model = model,
        prompt = prompt,
        stop_sequences=None,
        temperature=0,
        max_output_tokens=100
    )

    bot_response = response.result

    chat_history = []
    chat_history.append(f"Use: {user_input} \n AUCSE Palm BOT {bot_response}")

    return render_template(
        "chatbot.html",
        user_input=user_input,
        bot_response=bot_response,
        chat_history=chat_history
    )
if __name__ == "__main__":
    app.run(debug=True)


 In terminal 

pip install flask
pip install dotenv
pip install google.generativeai

Step 3: [Front End- index, chatbot.htmls files ]

Under the subdirectory create files index.html with the following contents

<html lang="en">
<head>
    <meta charset="UTF-8">
    <meta name="viewport" content="width=device-width, initial-scale=1.0">
    <title>AUCSE PaLM Bot</title>
</head>
<body>
    <h1>AUCSE PaLM BOT</h1>
    <p>AUCSE PaLM Bot: Welcome to our AUCSE ! </p>
    <form method="post" action="{{url_for('chatbot')}}" class="chat-input">
        <input type="text" id="message" name="message" placeholder="type your msg...">
        <button type="submit">Send</button>    
    </form>
</body>
</html>

create anotherfile chatbot.html with the following code (same as above with little modification with adding after <h1> tag <p>{{bot_response}}<p>
<html lang="en">
<head>
    <meta charset="UTF-8">
    <meta name="viewport" content="width=device-width, initial-scale=1.0">
    <title>AUCSE Chat Bot</title>
</head>
<body>
    <h1>AUCSE PaLM BOT</h1>
    <p>{{bot_response}}</p>
     <form method="post" action="{{url_for('chatbot')}}" class="chat-input">
        <input type="text" id="message" name="message" placeholder="type your msg...">
        <button type="submit">Send</button>
    </form>
</body>
</html>

Now run server.py by clicking the top right button play(run) . You will get screen similar according to your environment

If you click the above image, you will see the contents clearly. You can see the server running,
with line Running on http://127.0.0.1:5000. If you move your mouse, place on that, and CTRL + CLICK, you will get browser window similar as shown below:
If you enter question 
What is AWS?
You will get screen as shown below:

Wow ! It is so Simple to generate a basic PalM based Chat bot with google Generative Ai and Flask in Python. 

You can modify model, parameters like temperature, max_number_tokens, etc., as per your will and requirements. You can add features.
You can beautify with css in html files for stunning look and feel. Deep dive in to PaLM!! Have greate Fun and Enjoy! Sky is even no Limit?!


Making Prompts for Profile Web Site

  Prompt: Can you create prompt to craft better draft in a given topic. Response: Sure! Could you please specify the topic for which you...